
By: Team F09-1 Since: Sept 2018
- 1. Introduction
- 2. Quick Start
- 3. Features
- 3.1. Viewing help :
help - 3.2. Logging into system:
login - 3.3. Creating a new user account:
createaccount - 3.4. Adding a person:
add - 3.5. Adding person’s skill:
asl - 3.6. Sorting :
sort - 3.7. Editing a person :
edit - 3.8. Listing all persons :
list - 3.9. Locating persons:
find - 3.10. Undoing Find Commands:
undofind - 3.11. Search Pruning Feature with list, find and undofind commands
- 3.12. Deleting :
delete - 3.13. Selecting a person :
select - 3.14. Budgeting feature:
budget,calculatebudgetandviewbudget - 3.15. Listing entered commands :
history - 3.16. Undoing previous command :
undo - 3.17. Redoing the previously undone command :
redo - 3.18. Clearing all entries :
clear - 3.19. Exiting the program :
exit - 3.20. Saving the data
- 3.21. Encrypting data files
[coming in v2.0]
- 3.1. Viewing help :
- 4. FAQ
- 5. Command Summary
1. Introduction
NUSSU-Connect is a CLI application designed and created for all members of the NUS Student Union (NUSSU). It allows you to reduce your workload and your organisation to potentially minimize manpower and logistics issues during peak periods of activity by providing you a convenient platform to manage contacts, recruitment and budgeting efficiently. This application can also be used by any organisation with a clearly defined hierarchy of roles and responsibilities amongst its members. The aim of this application is to digitise an organisation’s standard operations, while streamlining workflow to minimize and potentially solve, some key manpower and logistics issues that can arise especially during peak periods of the organisation’s activities.
2. Quick Start
-
Ensure you have Java version
9or later installed in your Computer. -
Download the latest
NUSSU-Connect.jarhere. -
Copy the file to the folder you want to use as the home folder for your NUSSU-Connect.
-
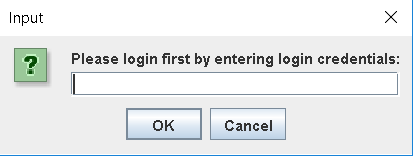
Double-click on the jar file to start the app and wait for a few seconds for the loading to complete. You will then see a login pop up window appears as shown in the image below. You will need to head over to section 3.1, "Logging into system" and follow the steps detailed carefully in order to log into the application successfully.
-
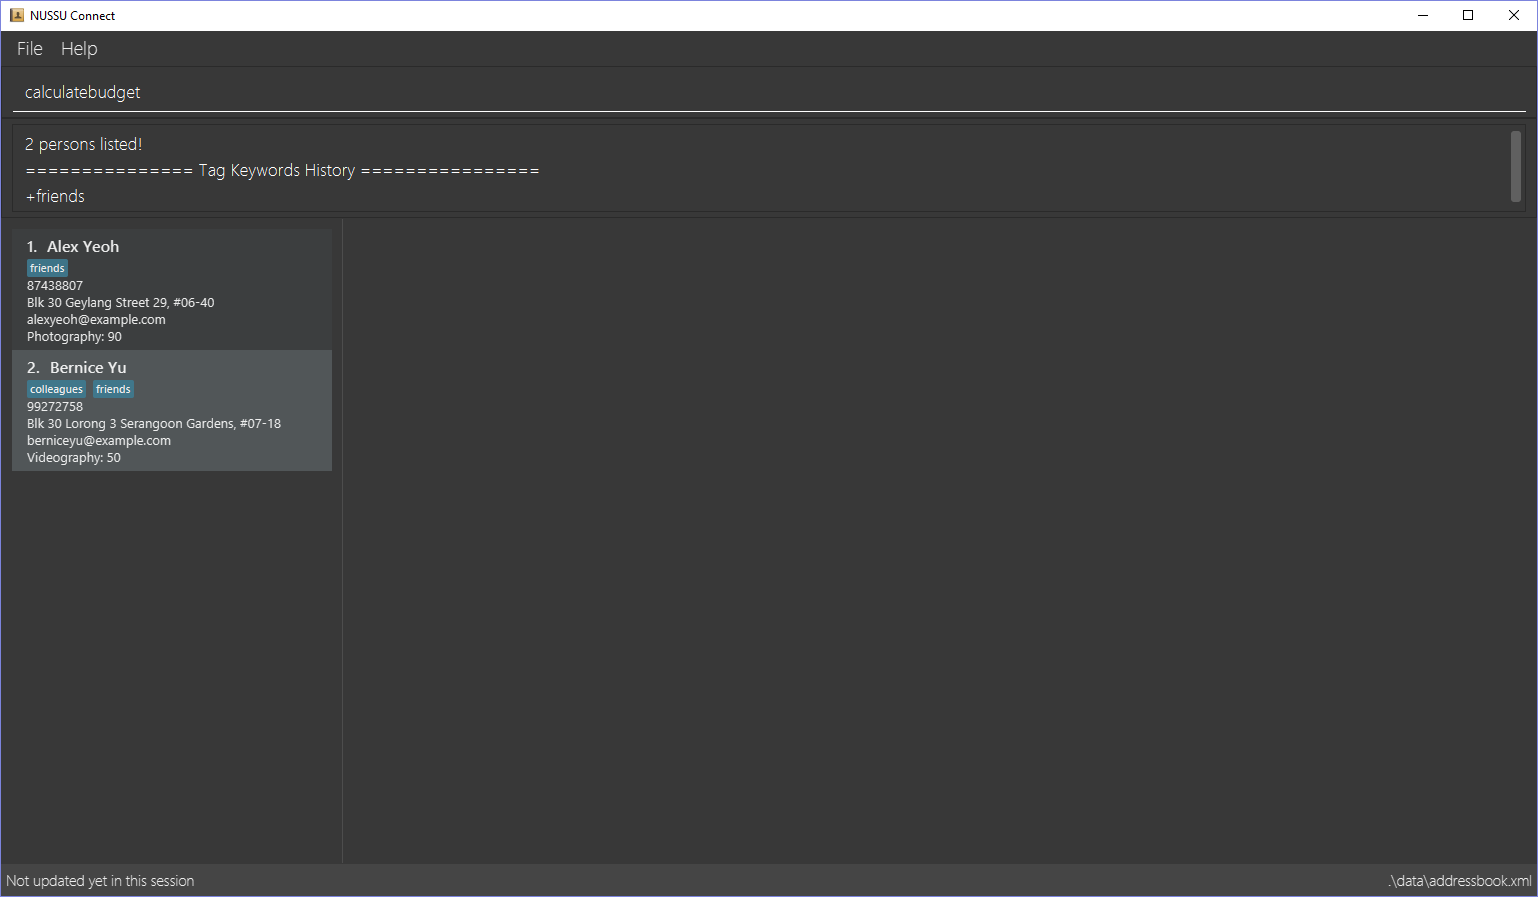
Upon a successful attempt, you should see the main window of the application load up, as shown in the image below.
-
Type the command in the command box and press Enter to execute it.
e.g. typinghelpand pressing Enter will open the help window. -
Some example commands you can try:
-
list: lists all contacts -
createaccountA1234568M zaq1xsw2cde3 member: creates a new account withA1234568Mas the user id,zaq1xsw2cde3as the user password, andmemberas the user role of the account to be created. -
addn/John Doe p/98765432 e/johnd@example.com a/John street, block 123, #01-01: adds a contact namedJohn Doeto NUSSU-Connect. -
delete3: deletes the 3rd contact shown in the current list -
exit: exits the app
-
-
You can refer to Section 3, Section 3, “Features” subsection to see more detailed documentation of the features that are built in this application.
3. Features
Command Format
-
Words in
UPPER_CASEare the parameters to be supplied by the user e.g. inadd n/NAME,NAMEis a parameter which can be used asadd n/John Doe. -
Items in square brackets are optional e.g
n/NAME [t/TAG]can be used asn/John Doe t/friendor asn/John Doe. -
Items with
… after them can be used multiple times including zero times e.g.[t/TAG]…can be used ast/friend,t/friend t/familyetc. -
Parameters can be in any order e.g. if the command specifies
n/NAME p/PHONE_NUMBER,p/PHONE_NUMBER n/NAMEis also acceptable.
3.1. Viewing help : help
Format: help
3.2. Logging into system: login
Logs into application using relevant credentials.
Format: login USERID PASSWORD ROLE
Examples:
-
login A1234567M zaq1xsw2cde3 president
Logs in with user ID as A1234567M, password as zaq1xsw2cde3 and role as president.
|
The default account login details for logging in when the application is launched for the very first time, can be illustrated in the picture below. You must enter the login details shown in the picture exactly, as all the login parameters are case-sensitive. Thus, any difference in casing between the actual and expected input characters will lead to failure in logging into the application. |

|
You should expect to see the main window of the application as shown below. |
|
If you are unable to log in successfully, you should expect to see the login input field in a pop-up box again, asking you to input your login credentials again. |
|
User Id, Password and Role inputs are all case-sensitive! |
|
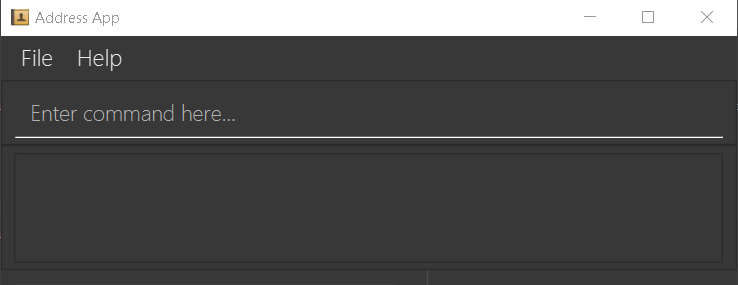
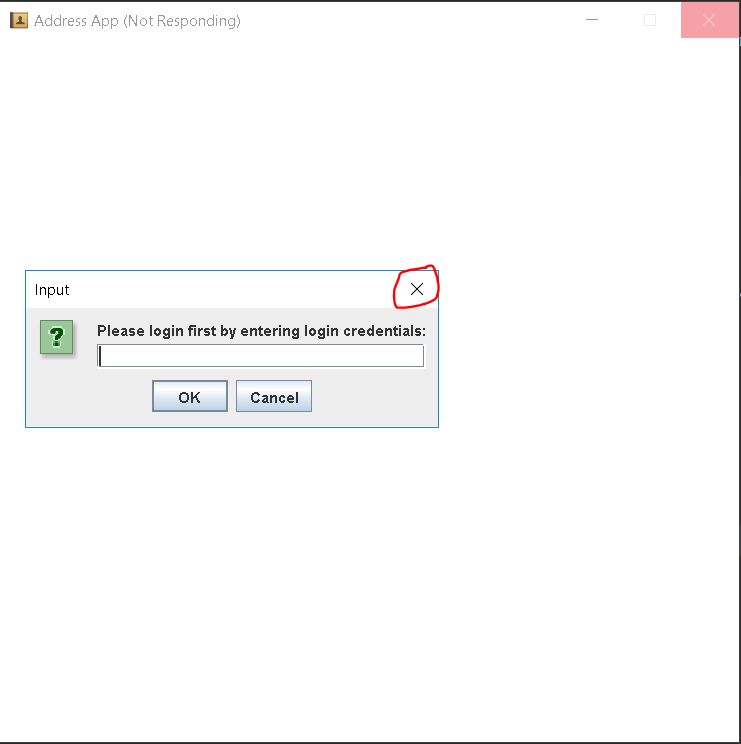
If you attempt to minimize the application before logging in to do other things, only to come back to the application later, and you want to close the application, you should not click on the cross button on the top right hand corner of the application, as shown in the image below. It is not recommended to close the application as shown in the image below, as this would cause the application to become unresponsive. You should switch windows repeatedly with the Alt + Tab keys on your keyboard until you can see the login dialog box shown in the image below. Once that is done, you can then safely click on the cross button found on the top right hand corner of the dialog box, circled in red, to close the application. |
3.3. Creating a new user account: createaccount
Creates a new user account in the NUSSU-Connect.
Format: createaccount USERID PASSWORD ROLE
Examples:
-
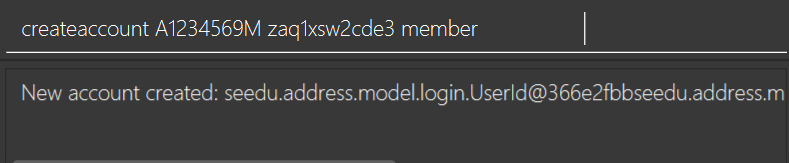
createaccount A1234569M zaq1xsw2cde3 member
Creates a new account with user ID as A1234569M, password as zaq1xsw2cde3 and role as member.
The image below shows the outcome of a successful creation of a new account.
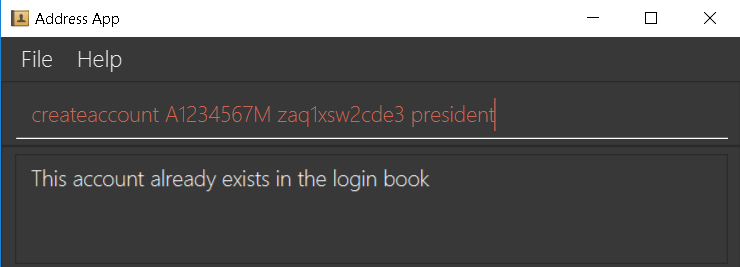
The image below shows an unsuccessful creation of a new account due to an account already existing.
3.4. Adding a person: add
Adds a person to NUSSU-Connect+
Format: add n/NAME p/PHONE_NUMBER e/EMAIL a/ADDRESS [t/TAG]…
| A person can have any number of tags (including 0) |
Examples:
-
add n/John Doe p/98765432 e/johnd@example.com a/John street, block 123, #01-01 -
add n/Betsy Crowe t/friend e/betsycrowe@example.com a/Newgate Prison p/1234567 t/criminal
3.5. Adding person’s skill: asl
Edits a person’s skill in NUSSU-Connect.
Format: asl INDEX s/SKILL l/SKILL_LEVEL
| A skill level must be an integer from 0 to 100 (inclusive). |
Examples:
-
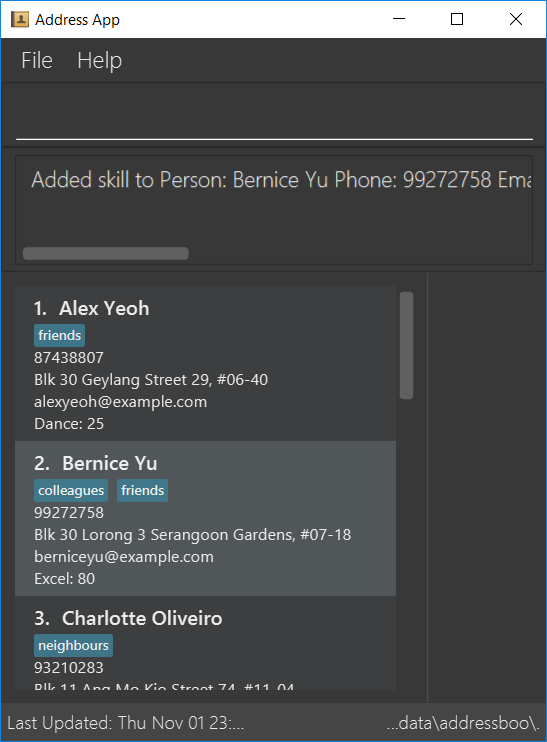
asl 2 s/Photography l/30 -
asl 4 s/Java l/40
Before executing the command:

After executing the command:
3.6. Sorting : sort
Sorts a list of people in NUSSU Connect.
Format: sort st/[PARAMETER]
The sort command currently sorts and displays all data in NUSSU Connect. Interaction between this command
and the find command is coming in v2.0.
|
Examples:
-
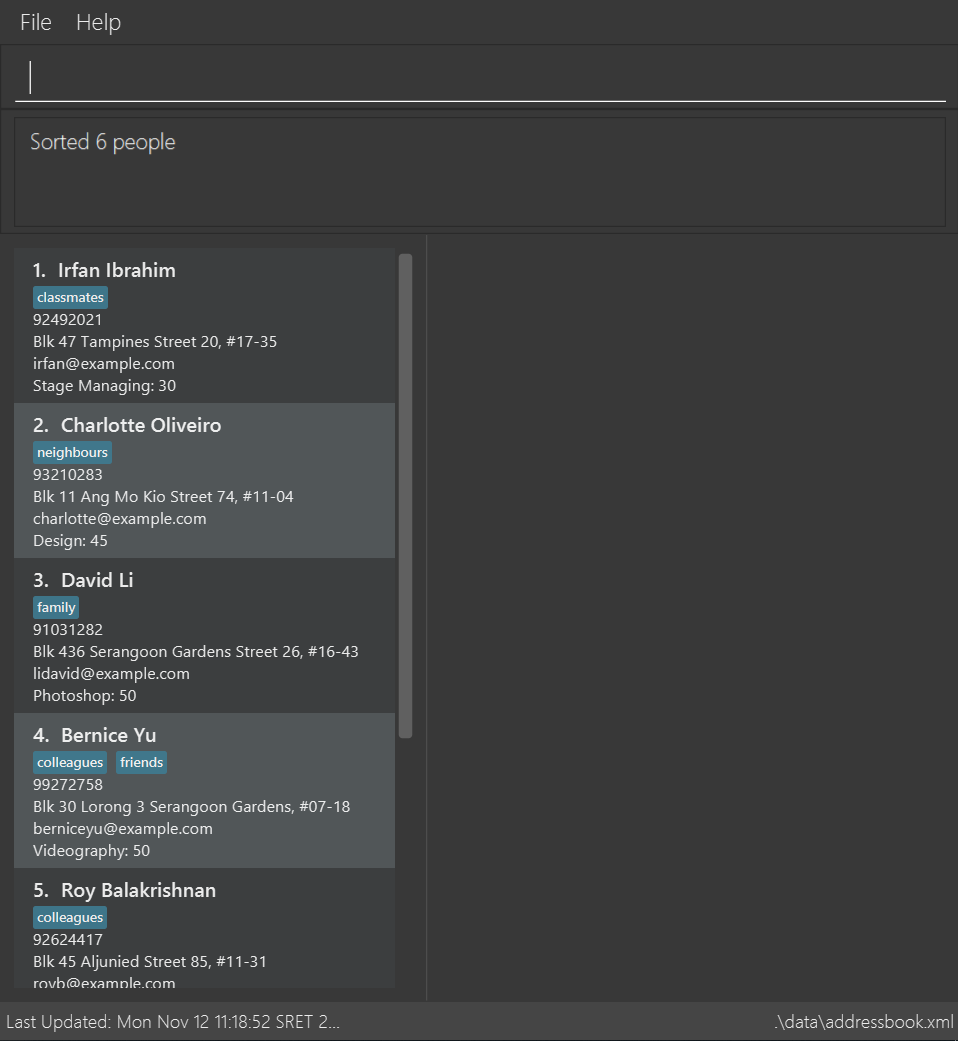
sort st/name
Sorts the list of people by name, in alphabetical order. -
sort st/skill
Sorts the list of people by skill, in alphabetical order. -
sort st/sl
Sorts the list of people by skill level, in order of increasing skill.
Before executing the command:
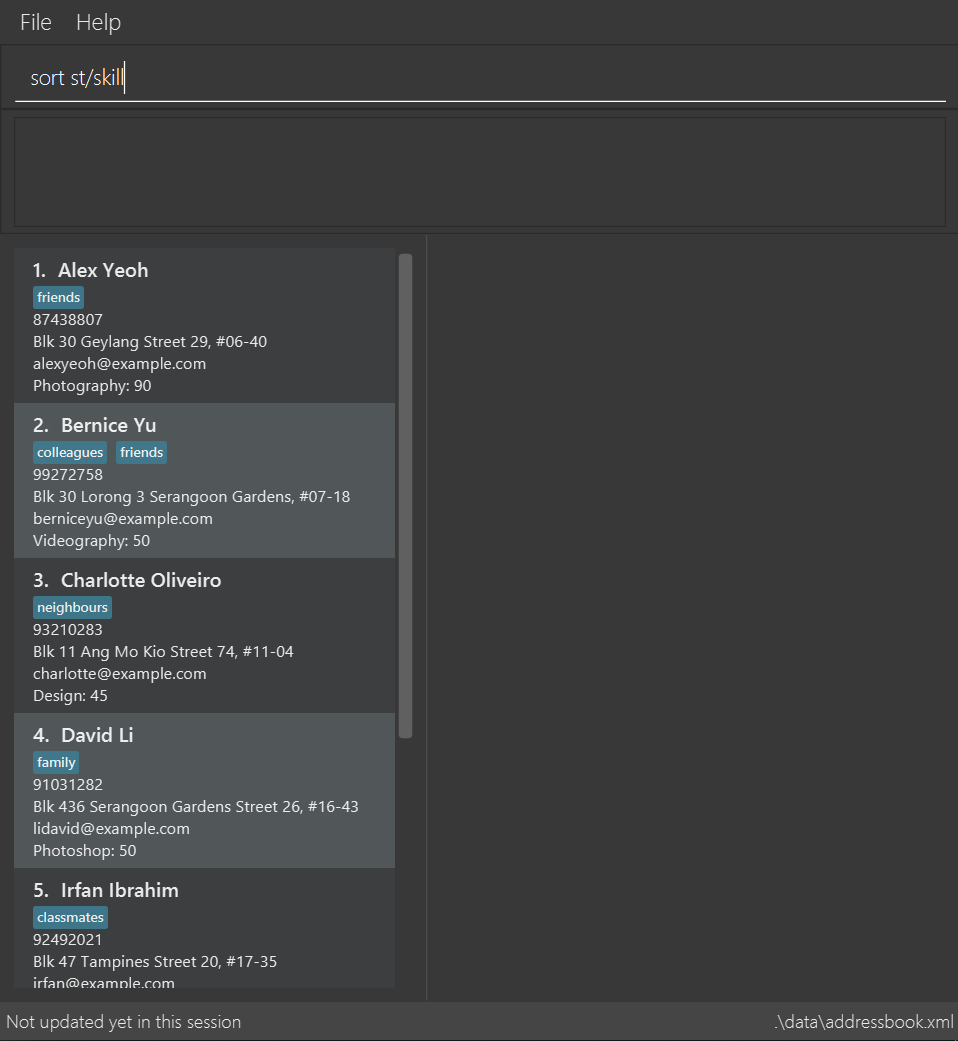
After sorting by skill:
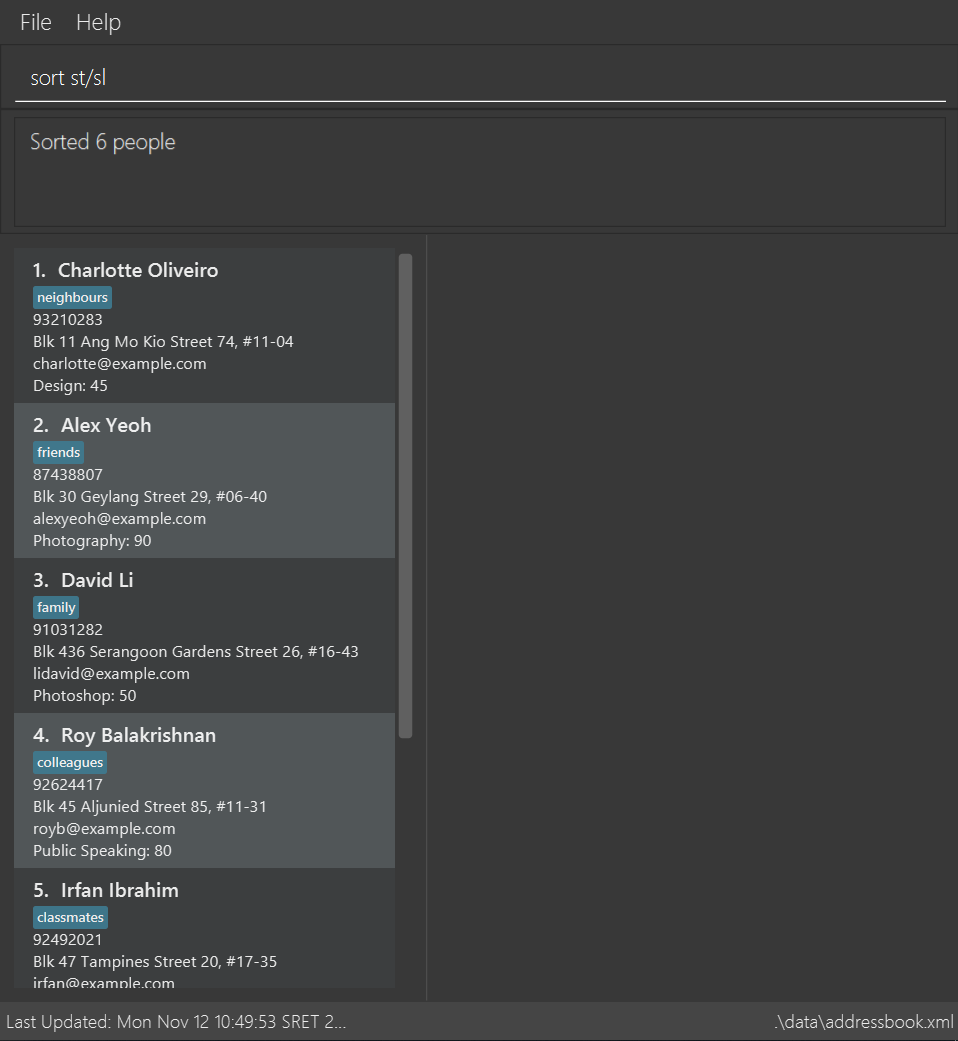
After sorting by sl (skillLevel):
3.7. Editing a person : edit
Edits an existing person in NUSSU-Connect.
Format: edit INDEX [n/NAME] [p/PHONE] [e/EMAIL] [a/ADDRESS] [t/TAG]…
Examples:
-
edit 1 p/91234567 e/johndoe@example.com
Edits the phone number and email address of the 1st person to be91234567andjohndoe@example.comrespectively. -
edit 2 n/Betsy Crower t/
Edits the name of the 2nd person to beBetsy Crowerand clears all existing tags.
3.8. Listing all persons : list
Shows a list of all persons in the NUSSU-Connect.
Format: list
3.9. Locating persons: find
Finds persons in the displayed list whose names/tags contain any of the given keywords.
If the \exclude option is enabled, the matched person will be excluded from the list instead.
Format: find [\tag] [\exclude] KEYWORD [MORE_KEYWORDS]
Examples:
-
find John -
find John
ReturnsjohnandJohn Doe -
find Betsy Tim John
Returns any person having namesBetsy,Tim, orJohn -
find \exclude Tom
Returns any person without the nameTom. -
find \tag President
Returns any person with the tagPresident -
find \tag President VicePresident
Returns any person with the tagPresidentORVicePresident. -
find \tag \exclude President
Returns any person without the tagPresident.
3.10. Undoing Find Commands: undofind
Reverts the displayed list to the state before you perform your most recent find command
Format: undofind
3.11. Search Pruning Feature with list, find and undofind commands
The Search Pruning feature was introduced to NUSSU Connect in v1.1 and it lets you trim the list of contacts with every successive find command. This feature will you to search through a large list of contacts in a much more intuitive manner without the hassle of typing a long single line command that is usually error-prone.
To provide you with an idea on how you can utilize the Search Pruning feature, the concept of the Search Pruning
feature will be further illustrated with the example below
1. Search Pruning with Find Commands
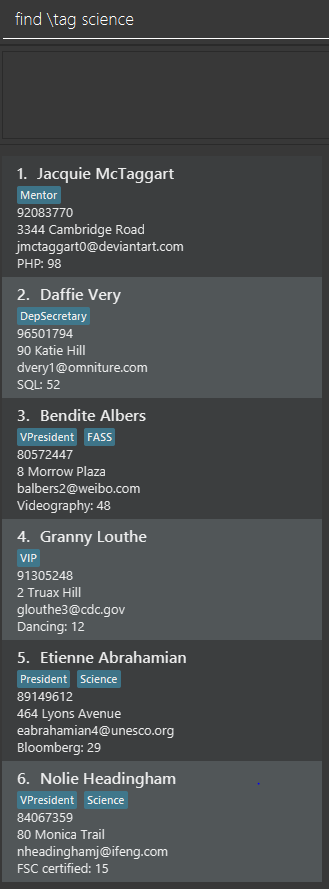
Assume that the original list of contacts contains the following six persons and you wanted to search for all persons
with the science tag. You could do this by executing the command find \tag science.
After executing the command the displayed list will now contain 2 persons, both with the science tag.
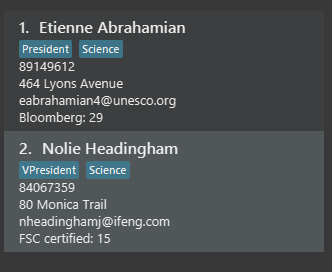
The following message will be displayed in the Command Result Box to tell you the keywords that you have previously executed.
The "+" prefix before a keyword is used to denote that you chose to include all persons with the relevant keyword in
the displayed list.

Next, you wanted to exclude everyone that has the tag VPresident and you could do that by executing the command
find \tag \exclude VPresident.
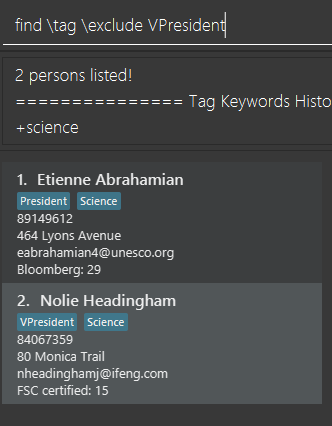
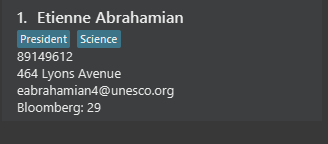
The command will filter according to the previous displayed list instead of the original contacts list and the
displayed list now contains only 1 person with the President Tag as everyone with the VPresident tag have been excluded.
The Command Result Box will now display an extra vpresident keyword with the "-" prefix, denoting that all persons
with the vpresident tag has been excluded from the list

2 . Making a mistake and undoing it with undofind command
Now assume that you have made a mistake and you want to revert to the list before you execute your most
recent find command. You can do so with the undofind command
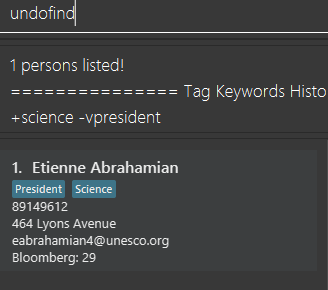
After executing the undofind command, the displayed list is reverted to the state before the
find \tag \exclude VPresident command was executed

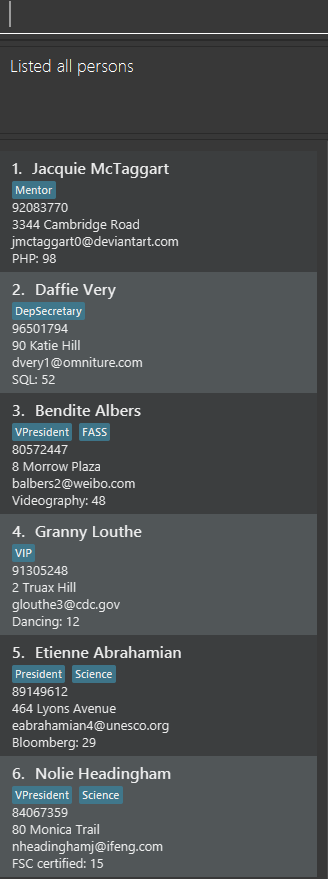
3 . Reverting to initial state with list command
You can revert to the initial state before any find commands are executed with the list command
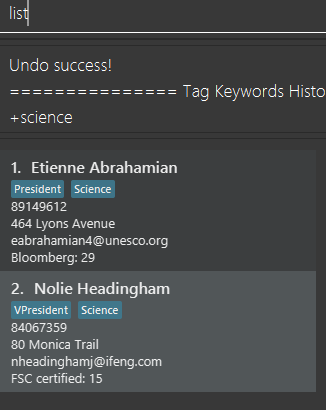
After executing the list command, all search history is cleared and the displayed list now contains all six persons.
3.12. Deleting : delete
Deletes a specific person from NUSSU-Connect.
Format: delete [INDEX]
Examples:
-
list
delete 2
Deletes the 2nd person in NUSSU-Connect. -
find Betsy
delete 1
Deletes the 1st person in the results of thefindcommand.
3.13. Selecting a person : select
Selects the person identified by the index number used in the displayed person list.
Format: select INDEX
Examples:
-
list
select 2
Selects the 2nd person in NUSSU-Connect. -
find Betsy
select 1
Selects the 1st person in the results of thefindcommand.
3.14. Budgeting feature: budget, calculatebudget and viewbudget
The budgeting process has 3 steps and involves club members and NUSSU treasurers as the users in the different steps
Step 1: Submitting the data for budget allocation which is to be done by club members.
Step 2: Calculating the budgets to be allocated which is to be done by NUSSU treasurers.
Step 3: Viewing the allocated budget of a club which can be done by either club members, NUSSU treasurers or club Presidents.
3.14.1. Submitting data for budget allocation: budget
This is the first step in the budgeting process!
This command allows you to submit the budget calculation data for your club - the name of your club, number of events your club is planning to host and the expected turnout of the events. Remember to be logged in with member credentials to gain access to this command!
Format: budget c/CLUB NAME t/EXPECTED TURNOUT e/NUMBER OF EVENTS
Example:
budget c/Computing Club t/200 e/5
|
CLUB NAME is case sensitive. Hence |
|
EXPECTED TURNOUT and NUMBER OF EVENTS must be postive whole numbers. |
|
In the v1.4 |
3.14.2. Calculating the budgets : calculatebudget
This is the second step in the budgeting process!
After all the clubs' budget calculation data has been submitted by the club members, you can log in with treasurer credentials and use this command to calculate and allocate budgets to all the clubs based on the total available budget you have specified
Format: calculatebudget b/TOTAL AVAILABLE BUDGET IN SGD
Example:
calculatebudget b/50000
|
Ensure that TOTAL AVAILABLE BUDGET is a positive whole number, i.e. it can also be zero. |
|
Remember to only use the |
3.14.3. Viewing the allocated budget for a club : viewbudget
This is the third and final step in the budgeting process!
This command shows you the budget allocated to the club that you have specified. Remember to be logged in with either member, treasurer or president credentials to have access to this command!
Format: viewbudget c/CLUB NAME
Example:
viewbudget c/Computing Club
3.15. Listing entered commands : history
Lists all the commands that you have entered in reverse chronological order.
Format: history
|
Pressing the ↑ and ↓ arrows will display the previous and next input respectively in the command box. |
3.16. Undoing previous command : undo
Restores NUSSU-Connect to the state before the previous undoable command was executed.
Format: undo
|
Undoable commands: those commands that modify NUSSU-Connect’s content ( |
Examples:
-
delete 1
list
undo(reverses thedelete 1command) -
select 1
list
undo
Theundocommand fails as there are no undoable commands executed previously. -
delete 1
clear
undo(reverses theclearcommand)
undo(reverses thedelete 1command)
3.17. Redoing the previously undone command : redo
Reverses the most recent undo command.
Format: redo
Examples:
-
delete 1
undo(reverses thedelete 1command)
redo(reapplies thedelete 1command) -
delete 1
redo
Theredocommand fails as there are noundocommands executed previously. -
delete 1
clear
undo(reverses theclearcommand)
undo(reverses thedelete 1command)
redo(reapplies thedelete 1command)
redo(reapplies theclearcommand)
3.18. Clearing all entries : clear
Clears all entries from NUSSU-Connect.
Format: clear
3.19. Exiting the program : exit
Exits the program.
Format: exit
3.20. Saving the data
NUSSU-Connect data are saved in the hard disk automatically after any command that changes the data.
There is no need to save manually.
3.21. Encrypting data files [coming in v2.0]
{explain how the user can enable/disable data encryption}
4. FAQ
Q: How do I transfer my data to another Computer?
A: Install the app in the other computer and overwrite the empty data file it creates with the file that contains the data of your previous NUSSU-Connect folder.
5. Command Summary
-
Help :
help -
Login :
login USERID PASSWORD ROLE
e.g.login A1234568M zaq1xsw2cde3 member -
Create Account :
createaccount USERID PASSWORD ROLE
e.g.createaccount A1234566M zaq1xsw2cde3 member -
Add
add n/NAME p/PHONE_NUMBER e/EMAIL a/ADDRESS [t/TAG]… -
Add Skill:
asl [INDEX] s/{SKILL} l/[SKILLLEVEL] -
Sort :
sort st/[parameter]
e.g.sort st/skill -
Edit :
edit INDEX [n/NAME] [p/PHONE_NUMBER] [e/EMAIL] [a/ADDRESS] [t/TAG]…
e.g.edit 2 n/James Lee e/jameslee@example.com -
List :
list -
Find :
find [\tag] [\exclude] KEYWORD [MORE_KEYWORDS]
e.g.find James Jake
e.gfind \tag President -
Undo Find :
undofind -
Delete :
delete [INDEX]
e.g.delete 3 -
Select :
select INDEX
e.g.select 2 -
Submitting data for budget :
budget c/CLUB NAME t/TURNOUT e/NUMBER OF EVENTS
e.g.budget c/Computing Club t/200 e/5 -
Calculating budgets :
calculatebudget b/TOTAL AVAILABLE BUDGET IN SGD
e.g.calculatebudget b/50000 -
Viewing the budget for a club :
viewbudget c/CLUB NAME
e.g.viewbudget c/Computing Club -
History :
history -
Undo :
undo -
Redo :
redo -
Clear :
clear -
Exit :
exit